How to Properly Stretch Shoes for Bunions: DIY Methods That Actually Work
You found the perfect shoes — except they press right on your bunion. Before you return them, try stretching. Leather and some synthetic shoes can be stretched 5-10mm in targeted areas, which is often enough to accommodate a bunion comfortably.
Materials That Can Be Stretched
- Full-grain leather: Best stretching material — molds permanently to your foot shape
- Suede: Stretches well but is more delicate — be gentle
- Synthetic leather/PU: Limited stretch — may crack if forced
- Canvas: Some give, but less predictable than leather
- Mesh/knit uppers: Already flexible — usually don't need stretching
- Patent leather: Difficult to stretch — the coating limits flexibility
Method 1: Ball-and-Ring Shoe Stretcher (Best for Bunions)
A ball-and-ring attachment specifically targets the bunion area of a shoe:
- Insert the shoe stretcher into the shoe
- Position the ball plug at the exact bunion pressure point
- Spray shoe stretching solution on the inside and outside of the bunion area
- Turn the handle to expand the stretcher until you see the leather bulge slightly at the ball plug
- Leave for 24-48 hours
- Remove and test fit. Repeat if more stretch is needed
Method 2: Freezing Water Bags
- Fill a zip-lock bag halfway with water and seal tightly (double bag to prevent leaks)
- Insert the bag into the shoe, positioning it against the bunion area
- Place the shoe in the freezer overnight
- As water freezes, it expands, gently stretching the shoe from inside
- Remove from freezer, let thaw 20 minutes, remove bag, and test fit
Best for: Canvas and non-leather shoes that won't respond to traditional stretching.
Method 3: Heat and Wear
- Put on thick wool socks (two pairs if possible)
- Put on the tight shoes
- Use a hair dryer on medium heat, held 6 inches away, targeting the bunion area for 2-3 minutes
- Keep the shoes on while they cool (15-20 minutes)
- The leather softens with heat and molds to the expanded shape as it cools
Caution: Don't overheat — excessive heat can damage leather finish and adhesives.
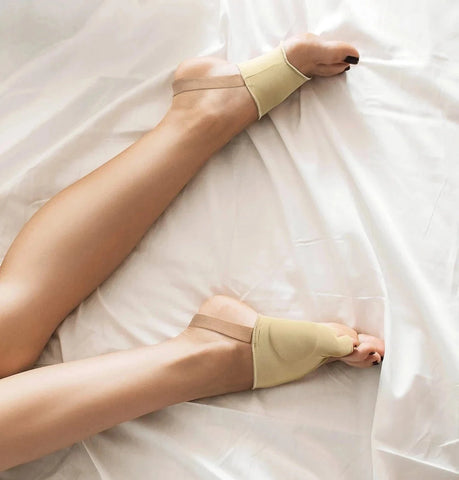
Readers who found this guide helpful are also checking these out — used by 1,800+ customers managing bunion pain at home:

What customers are saying
“The biggest win for me is the pain relief. I used to have this constant ache around the bunion area, especially after a long day on my feet. With the sleeve on, that pain has significantly toned down. I won't say it's a miracle cure, but it's definitely given me some much-needed comfort.”
“My right foot had been bothering me for months — shoes that were always comfortable suddenly hurt after a long day. I’ve been wearing these sleeves for three weeks now and my foot feels mostly back to normal. And the shipping was incredibly fast.”
Method 4: Professional Shoe Stretching Spray
- Apply stretching spray to both inside and outside of the bunion area
- Immediately put on thick socks and wear the shoes for 1-2 hours
- The spray softens the leather fibers, allowing them to permanently reshape
- Commercial sprays work better than home remedies (rubbing alcohol, etc.)
Method 5: Professional Cobbler Stretching ($15-$30)
A cobbler uses industrial stretching equipment that applies precise, even pressure:
- Can target specific areas (bunion, pinky toe, instep)
- More effective than home methods — professional equipment applies greater force safely
- Takes 24-48 hours typically
- Best option for expensive or delicate shoes you don't want to risk damaging
Method 6: Newspaper/Towel Stuffing (Gentle)
- Dampen newspaper or a small towel
- Pack firmly into the toe box, pushing out the bunion area
- Let dry completely (12-24 hours)
- Provides mild stretch — best for shoes that only need 1-2mm of extra room
What NOT to Do
- Don't use boiling water: Destroys leather, melts adhesives, ruins shoe structure
- Don't over-stretch: Shoes that are 2+ sizes too small can't be saved by stretching
- Don't use pure alcohol: Can stain and dry out leather. Use commercial stretching spray instead.
- Don't force rigid shoes: Plastic or hard synthetic materials will crack, not stretch
Setting Realistic Expectations
- Width stretch potential: 5-10mm — about a half-width to full-width size
- Length stretch: Minimal (2-3mm max) — shoes primarily stretch in width
- Number of attempts: May need 2-3 stretching sessions for optimal results
- Permanent? Yes — properly stretched leather retains its new shape
Stretching can transform a "almost perfect" shoe into a comfortable everyday option. But remember: stretching is a fix for shoes that are slightly narrow. If the shoe is fundamentally the wrong shape for your foot, no amount of stretching will make it comfortable.