Bunion Taping Techniques: Do They Actually Work? A Physical Therapist's Guide
Bunion taping is one of the most-searched non-surgical remedies on the internet — but does it actually help? As someone who works with bunion patients daily, I'll walk you through the evidence, show you the three most effective taping techniques, and explain when taping works (and when it doesn't).
What Does Bunion Taping Do?
Taping for bunions (hallux valgus) works by applying external force to gently realign the big toe toward its natural position. It doesn't reverse the bony deformity, but research shows it can:
- Reduce pain by 20-40% during weight-bearing activities
- Temporarily improve toe alignment by 5-10 degrees
- Decrease pressure on the medial eminence (the "bump")
- Improve gait mechanics by restoring more natural toe push-off
A 2023 study in the Journal of Foot and Ankle Research found that kinesiology taping combined with exercises was more effective than exercises alone for reducing bunion pain over 8 weeks.
Technique 1: The Classic Big Toe Pull (Best for Beginners)
This is the simplest and most widely recommended technique. You'll need:
- 1-inch athletic tape or kinesiology tape (KT tape)
- Skin prep wipes (optional, improves adhesion)
Steps:
- Start with clean, dry skin — no lotions or oils
- Cut a strip of tape approximately 8-10 inches long
- Anchor the tape on the inner side of your big toe (medial side)
- Gently pull your big toe toward the midline of your foot
- While holding that position, wrap the tape under the foot and secure on the outer side
- Apply a second anchor strip around the midfoot for stability
When to use: During the day under socks and shoes. Remove if numbness, tingling, or increased pain occurs.
Technique 2: The Figure-8 Wrap (Best for Active People)
This technique provides more stability during exercise and walking:
- Anchor tape on the top of the big toe
- Wrap around the toe and cross under the ball of the foot
- Continue around the outside of the midfoot
- Cross back over the top of the foot in a figure-8 pattern
- Secure with a final horizontal strip across the top of the foot
This method keeps the tape secure during movement and is popular among runners and walkers who have mild-to-moderate bunions.
Technique 3: The Kinesiology Fan Tape (Best for Swelling)
If your bunion is inflamed and swollen, this technique helps with both alignment and lymphatic drainage:
- Cut a Y-strip of kinesiology tape (one base, two tails)
- Anchor the base below the bunion joint on the inner foot
- Stretch one tail across the bunion bump toward the outer foot
- Stretch the second tail under the big toe to guide alignment
- Apply with 25-50% stretch — never full stretch, which can irritate skin
When Taping Alone Isn't Enough
Taping is a great temporary measure, but it has limitations:
- Moderate to severe bunions (HV angle > 30°): Taping won't provide enough corrective force
- Arthritis in the big toe joint: Taping can actually increase stiffness
- All-day use: Tape adhesion decreases over hours, especially with sweating
- Long-term correction: Tape provides temporary relief, not lasting structural change
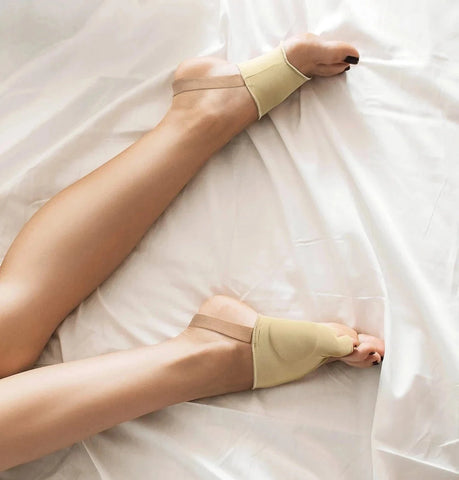
For consistent, all-day support without the hassle of reapplying tape, many physical therapists recommend medical-grade bunion correction sleeves that provide the same realignment force with better comfort and durability.
Readers who found this guide helpful are also checking these out — used by 1,800+ customers managing bunion pain at home:

What customers are saying
“The biggest win for me is the pain relief. I used to have this constant ache around the bunion area, especially after a long day on my feet. With the sleeve on, that pain has significantly toned down. I won't say it's a miracle cure, but it's definitely given me some much-needed comfort.”
“My right foot had been bothering me for months — shoes that were always comfortable suddenly hurt after a long day. I’ve been wearing these sleeves for three weeks now and my foot feels mostly back to normal. And the shipping was incredibly fast.”
Combining Taping with Exercises for Best Results
The most effective non-surgical bunion management combines taping or sleeves with targeted exercises:
- Toe spreads: Place rubber band around all toes, spread apart and hold 5 seconds × 20 reps
- Marble pick-ups: Use toes to pick up 20 marbles — builds intrinsic foot muscles
- Towel scrunches: Place foot on towel, scrunch it toward you using only toes
- Big toe push-downs: Press big toe into floor while lifting other toes, 15 reps × 3 sets
- Calf stretches: Tight calves increase forefoot pressure and worsen bunions
How to Choose the Right Tape
Not all tapes are equal for bunion management:
- Athletic tape: Most rigid, best corrective force, but least comfortable for all-day wear
- Kinesiology tape: Stretchy, breathable, comfortable — but less corrective force
- Medical adhesive tape: Good adhesion but can irritate sensitive skin
- Hypoallergenic options: Best for people with tape allergies or sensitive skin
Bunion taping is a legitimate, evidence-backed technique for pain relief and temporary alignment — just know its limits. For most people, combining taping or a bunion sleeve with consistent strengthening exercises delivers the best non-surgical results.